Loading...
Dark Knight Rises T-shirt Contest Winners Revealed All Week

Submissions 101, Shirt Design Contest Submission Guidelines

Getting Started with a New Shirt Design

In design and pretty much everything in life, it is always imperative to have a good foundation. So let us begin with the basics.

Color Mode
RGB, 8-bit
Resolution
300 DPI
Sizing
  • Standard 17.5" x 19"
  • Oversized 19" x 25"
  • All-over 40" x 35"

Don’t forget that resolution depends on which platform you are using. If you are designing in vector (Illustrator), then resolution does not apply. Just make sure to expand your strokes and text!

A strong suggestion DBH always makes to artists is for them to submit their work to the Critique Section of the Forum for feedback.

Alright, now that you have your canvas setup, you probably need to start thinking of what color you want your design to be printed on. Download a PDF (also editable in Illustrator) of the t-shirt blanks we have available that come along with suggested Pantone Colors.

Ok, now the easy part... create your design! We’ll leave that up to you. Be sure to check out wotto’s section on Design 101 for some helpful pointers and tips! You can also continue reading to gain even more knowledge awesomeness before you embark on your next design!

Submitting T Shirt Artwork

Now that your magnum opus is finito, it is time to grace the masses with its presence! Ahhhh let all those fortunate enough to come to DBH bask in our glory!

First things, first, you need to make three images:

Thumbnail
  • 320 x 240 pixels
  • Vote browse
  • Preview of design
Artwork
  • 640 x 480 pixels
  • Design detail
  • Showcases entire design
Placement
  • 640 x 480 pixels
  • Design detail
  • Design mocked up on a t-shirt

YOUR FILES SHOULD BE SAVED AS JPG's! If your images aren't jpgs, the system will not accept your file(s)!

Remember, in the submission process, DBH is not yet asking for your high resolution artwork. We will ask for that file (along with a few other things) if your design is chosen as a winner. How do you know if your design is a winner? Well, we send out an email notifying you if your design has been chosen.

Now go forth and honor the world with what they have been missing all their lives! Also, keep reading for some basic guidelines to keep in mind before submitting as well as while you’re designing.

RGB Only

Anything that is web related should be composed in the RGB color mode. When designing pieces for print/press, use CMYK.

Your thumbnail, artwork and placement images should all be submitted in the RGB color mode. Otherwise your colors will come out a bit wonky.

Do you have your design already made in CMYK and need to change it to RGB without starting over? Well, right this way...

  • RGB RGB
  • CMYK CMYK
Covert CMYK to RGB Photoshop Settings

Although this is an easy fix, get into the habit of setting up your documents in the right color mode. That way it leaves no room for error (in case your forget to switch it over)!

Originality & Creativity

Taking an image off the Internet that does not belong to you, running Illustrator’s Live Trace, and/or a Photoshop filter or the like is a big no-no!

If your design calls for a clock, don’t just Google “clock” and take the first image that comes up. More often than not, chances are those images are copyrighted, and taking and using them as your own is STRICTLY PROHIBITED (it’s called plagiarism)!! Your artwork will be rejected if the curator believes the artwork is not original and does not belong to the artist.

Using an image as “inspiration” is fine so long as we can see it as an inspiration and not a straight rip, which will be decided at the curator’s discretion.

We encourage our artists to be imaginative and to take their time when constructing their artwork. Don’t be in such a hurry and slap just any old filter or throw on a two-second Live Trace on some image from a search engine. Designs that are rushed show, and is quite easy to spot. Take your time, if the design isn’t working out, leave it for a few hours/days/weeks and come back to it later with a fresh mind. Keep in thought that even the best artists get design block!

  • copyright Copyright
  • live trace Live Trace
  • filter Filter

Pulling images off the web in general is not a good idea, unless you have paid for the rights, it is a free stock image, or it is a public domain image (those that are more than 100 years old and have not had their licenses repurchased). It is very difficult to decipher whether or not it is safe to use an image, so when in doubt, just scrap it! It may take longer, but it is definitely a lot cheaper than a lawsuit!
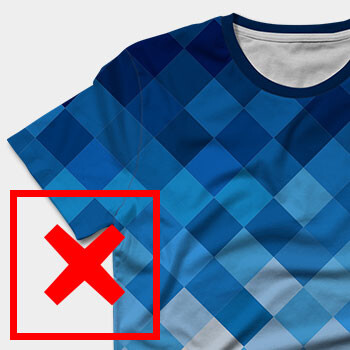
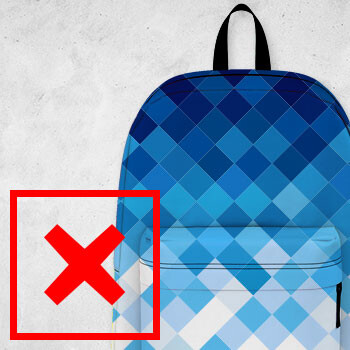
Designs that are comprised of random brushes, splatters and textures with no obvious thought to concept and design, won’t quite cut it either. Remember we are DesignByHumans, which is why we strive to print artwork that is refreshing and thoughtful in respect to the principles of design.

  • Random Splatters Random Splatters
  • Random Brushes Random Brushes
  • Random Texture Random Texture

Designs that are just randomly copied and pasted will not be accepted. We need composition and forethought! You can use similar elements, or even the same as long as it is done in an interesting and captivating style (like blooboy’sGhostez”). Pattern designs are awesome too, check out alexmdc’s incredibly detailed “The Hidden People”.

  • Copy & Paste Copy & Paste
  • Similar Pieces Similar Pieces
  • Pattern Pattern

Your artwork should also incorporate the t-shirt as part of the artwork. A great design is one that utilizes the t-shirt canvas with the art together in perfect harmony. Just gaze upon shantyshawn’sRed Riding Hood” and rejagalu’sWhen the Sun sets in the City of Sunrise; Another View” as a perfect examples.

  • Non-Boxy Non-Boxy
  • Non-Boxy When the sun sets in the city of sunrise; another view Non-Boxy

Back prints. Are they ok? Of course! If the design calls for this conceptually, we will accept your art (as long as it follows our other design acceptance standards). A great example of a design that has a front and back print is yonil’sWe did this to ourselves.

  • Front and Back Print Front and Back Print

Last, but not least, DBH is a PG-13 website, which means, we like art and design in good taste and style. That means designs that contain profanity, nudity or obscene content will be rejected immediately and is at the discretion of the curator! Let’s keep it clean!

Design 101, T Shirt Design Techniques

We are regularly asked for feedback on designs and very often we wonder if people understand what we mean when we use words like “depth” and “composition,” etc. So, we decided to put this together to try and help new designers understand what makes one design stand out against another. If you would like us to comment on your design post it here and we can give you feedback too.

1. Mastering a Shirt Design Concept, Theme and Idea

Some designs are lead by an idea or theme that tells the viewer something other than “Hello, I am a t-shirt, all pretty and stuff.” The idea can be subtle or in your face. It can be central to the design or a clever little element that is only revealed after a bit of looking. Artists who nail concepts/ideas/themes in their apparel design:

Never as it Seems by zerobriant

Never as it Seems” by zerobriant is a good example of this whole concept business. His design on first appearances almost seems abstract but then you see it is two worlds colliding. “An “upside-down illusion”. See something different when you look down at your shirt”. He hasn’t just thought “I’ll make something pretty” he has thought in depth about the wearer’s experience.

Perversion of paranoid populace by radiomode

PPP (perversion of paranoid populace)” by radiomode is another awesome example of this kind of design. He is making a statement with this design. CCTV and camera surveillance is invasive. You don’t have to agree with the statement, but it adds another layer to the design.

2. Abstract

An abstract design is simply a collection of shapes or lines that do not represent anything physical. Something considered apart from concrete existence. “Easy,” I hear you mutter. Not so, creating an abstract design takes real skill. Combining elements to make something look beautiful is very difficult.

Drifting by BeadlerWorks

One artist who immediately springs to mind is BeadlerWorks. His winning designs here are all examples of great abstract art. While some of his work has physical elements he has a way of making them come alive with abstracted elements. Note his winning design, “Drifting.” Movement is added using abstract elements and atmosphere is created with his color choices. What would have been just a house becomes something way more dramatic.

3. Composition

“The combining of distinct parts or elements to form a whole” basically sums it up. How you lay out elements on your canvas, in this case a t-shirt. How do you as a designer utilise the t-shirt area? How do the elements you use balance or contrast so that they appeal to the viewer? Questions all designers should ask themselves.

Pisces beauty”by SPYKEEE is a good example of composition, using the entire tee as a canvas and really making the art work with the t-shirt is clever.

Migratory Pattern” by dhectwenty uses the t-shirt to suggest movement brilliantly. He doesn’t have to use the whole tee or even many colors to create a beautiful piece of art.

4. Style

A style is something you gain through years of drawing and developing as an artist or designer. I personally have been drawing for about 30 years and all the time I have been developing a distinct style. People know it as mine and recognize it instantly. It takes work to get there and along the way you will draw on many influences. That’s not to say you copy a style from someone else, that friends is naughty. It’s also a whole other subject I could talk about for a year. Artists with a style all of their own: • a_mar_illoHydro74Recycledwaxhafaellmathiole

5. Depth

Depth in design can be described as many things; “the creation of something more than what is required or minimal, the hidden, the unclear, the difficult, the different, abundance and sometimes refinement and meaning.” For me depth is about layers of physical beauty or ideas. When you look at a design and see something within it. Layers of elements. It doesn’t need to be complicated but just thought provoking. Take the viewer on a journey. Make them look closer, question and ask “why?” Why is the Mona Lisa so famous? Lots of reasons, but partly because we are drawn in to her many layers, the cheeky smile, her eyes, the story. Capture that or something like it, and you’re there.

“Deepness” by timizy01
The designer hasn’t just looked at this in one direction. He has climbed to the bottom of the ocean and looked up. He has given us a new perspective. He has added layers with the animals and lighting and finally added a tentacle stretching out. Are all the creatures doomed? Is it really an octopus? Eep! Who knows? The point is the artist made me question it/look closer. This people, shows depth.

A Paper Boat” by nicebleed
Excellent example. First off, where the hell is that river leading off to? and why is it black? Are we all doomed? The girl is the second element, maybe she symbolizes hope as she places the paper boat onto the oily river. What is this statement? Who knows? But it could be interpreted in a number of ways by the viewer. Bingo! It has physical depth, but also depth of meaning. Head explodes!

6. Color

Color theory is a huge subject but here I will give you the whistle stop tour. Let’s jump in. When looking at color we have to respect the color wheel. The color wheel helps us to understand colors and how they relate to one another. Here she is:

OK don’t panic it’s not as scary as it looks. Let’s break it down. You have your 6 basic colors – red, orange, yellow, green, blue, and purple. Then you have the in-between colors that are mixes of the basic colors. Colors are categorized into 5 groups:

Primary – Red, Yellow, Blue. When you mix two primaries together, you get a secondary color.

Secondary – Purple, Green, Orange. These 3 colors are what you get when you mix the primary colors together. They’re located in-between the primary colors on the wheel to indicate what colors they’re made from.

Tertiary Colors – These are the other in-between colors like Yellow-Green, Blue-Green and Red-Violet. They’re made by mixing one primary color and one secondary color together. There are endless combinations of these badboys.

OK that’s the basics, phew! Next we get into more color names and categories.

Complementary Colors – Red and Green, Blue and Orange, Purple and Yellow. These are the colors directly across from eachother on the color wheel. They should be used with some caution because they are heavy in contrast but used well can look nice!

Analogous Colors – Red and Orange, Blue and Green, etc. These are colors right next to eachother on the color wheel. They usually go together well, but they also create almost no contrast.

Warm Colors – Red, yellow and orange. These colors make us feel all warm and cozy because they remind us of things like fire, the sun and heat.

Cool Colors – Blue, green and violet. These colors make our teeth chatter because they remind us of winter days, water or grass.

Neutral Colors – Beige, gray and brown. They aren’t on the color wheel, they got thrown out by those pesky Primaries. They are considered neutral because they don’t contrast with anything really. They’re dull and uneventful. Poor little colors :(

Monochromatic Colors – A monochromatic color scheme uses 3 different shades of one color. For example: Light, Medium, and Dark Green.

Value – This is the amount of black in a color. The more black a color has, the darker its value.

Brightness – This is the amount of white in a color. The more white a color has, the brighter it is.

Saturation – Is basically the amount of a color used. When a color is at full saturation, it is very vibrant. When a color is desaturated, a large amount of color has been removed. Desaturated colors become neutral because they appear grayer.

There is more to it but basically this is a good start. You can find some useful tips online such as www.kuler.adobe.com. This is a very useful resource that let’s you peruse awesome color combinations and create your own. www.colorschemedesigner.com is another cool tool for playing around with color.

mathiole has created his own recognizable color palette through his “watercolor style” digital illustration, seen in his “Ecstasy” design.

ninhol’s bright colors usually scare most designers off. However he uses bright, bold color very well, like in his design “.”

7. Line, Shape and Texture

Lines are pretty simple things but here are some interesting things you should know. The direction of a line can convey mood. Horizontal lines are calm and quiet, vertical lines suggest more of a potential for movement, while diagonal lines strongly suggest movement and give more of a feeling of vitality. Contour lines are lines that make the edge of a shape. Gesture lines are multiple lines that make the shape look like it’s moving. It suggests shaking or wobbling.

Value Lines or crosshatching can also be used to create areas of grey inside a drawing. These areas of darker shading inside a shape, called areas of value, can give a more three-dimensional feeling to an object. Crosshatching done right can look incredible.

In a picture, the shapes that the artist has placed are the positive shapes. The spaces around the shapes are the negative spaces. It is as important to consider the negative space in a picture as the positive shapes. Some artists can create pieces that have no distinction between positive and negative spaces, clever. M. C. Escher was the top dog at creating drawings like this.

Escher

Texture is the surface quality of an object. We feel texture when we touch objects and recognize roughness, smoothness or patterns. Texture is the artist’s way of creating these tactile impressions on to the two-dimensional image. Varying the pattern of light and dark areas on an object creates texture.

Red Riding Hood

shantyshawn uses line very well in the design “Red Riding Hood.” Note how the thick and thin lines make up a tunnel like effect that draws your eye into the centre. The focal point is the girl and he has used red to draw the eye in further. Hidden amongst the textured trees is a wolf adding depth and more story. It’s a design that just keeps on giving.

8. Movement

We all move and in art sometimes you want to portray movement, but how? Here’s how

Artists use repeated/fuzzy outlines to convey motion. Using multiple overlapping images gives us the impression of motion too. Eyes are awesome things, not just because they are the windows to your soul but because they see images cleverly. A good artist will lead the eyes on a journey around their artwork. Purposefully linking objects. “Rhythm” in art refers to the way your eye moves throughout a picture. Some images move your eye through them in a connected, flowing way, other images move you from one place to another in an abrupt, dynamic way Rhythm in art is created by the repetition of elements. The eyes have so much rhythm that optical illusions based on the repetition of geometric forms will cause your eye to produce motion where none is present. Yikes!

Once in a Blue Moon

zerobriant’sOnce in a Blue Moon” is the perfect example of movement in design. Look how uses a mixture of line thickness, curved strokes and repeated shapes to draw our eye around the design. That whale’s gonna jump right out of that tee!

9. Balance

When objects are of equal weight, they are balanced. If you have several small items on one side, a large object on the other side can balance them. Visual balance works in the same way. Let’s break it down.

Symmetrical Balance – Symmetrical balance is mirror image balance. If you draw a line down the center of the page, all the objects on one side of the screen are mirrored on the other side.

Asymmetrical Balance – Asymmetrical balance occurs when several smaller items on one side are balanced by a large item on the other side, or smaller items are placed further away from the center of the image than larger items. One darker item will need to be balanced by many lighter items.

An unbalanced design creates a feeling of tension, as if the whole thing might tip, looks unfinished or the eye is drawn to the area that seems to have something ‘missing’.

Color can help to balance things too; our eyes are drawn by color. Small areas of vibrant color can be used to balance larger areas of more neutral colors. Use shape and textures too, large flat areas without detail can be balanced by smaller irregularly shaped objects (maybe with texture) since the eye is led towards the more detailed shapes.

A focal point is the area you want the viewer to focus on or see first. Like that 60” LCD TV you have at home, that’s the first thing visitors see because it is awesome and right in the middle of the wall. A focal point can be supported by other elements around it to balance the whole image out.

Nairk1’sGiant Spirit is Hungry” has symmetrical balance. Not all the elements are the same on both sides but it is visually, intentionally balanced.

bad memory” by conker shows asymmetrical balance. The items are all different shapes and sizes but they are placed in a way that looks ‘right’. It is balanced by elements that make up a whole picture. Nothing looks out of place.

An Introduction to Screen Printing

From the minute you tear open the bag of your delivered tee and slap it on your back, you forget about the complex process your t-shirt went through before arriving on your doorstep. Here, we will attempt to give you some basic knowledge and guide you through the pit falls of screen printing. Something all good designers should know. Screen-printing is an art form all of its own, and DBH has always pushed the boundaries of printing and taken on complex artwork in an attempt to scare our printers. They haven't been beaten yet!

Screen printing is a printing technique that uses a woven mesh to support an ink-blocking stencil. The attached stencil forms open areas of mesh that transfer ink or other printable materials which can be pressed through the mesh as a sharp-edged image onto a substrate. A roller or squeegee is moved across the screen stencil, forcing or pumping ink past the threads of the woven mesh in the open areas.

Screen printing is also a stencil method of print making in which a design is imposed on a screen of silk or other fine mesh, with blank areas coated with an impermeable substance, and ink is forced through the mesh onto the printing surface. It is also known as silkscreen, serigraphy, and serigraph.

Let's begin with the basic elements of screen printing:

Screen Sizes

When we do our screen printing, there are three different sizes that we categorize our designs into:

1. Standard

Standard prints are pretty simple, they are less than 18” x 18” and are fairly small in size just like fatheed’s “A Simple Explanation” and sustici’s “Watermelon City.” Standard design sizes are usually the easiest and fastest to print due simply to their size. Easy to knock out, especially if they are just one color (which means one screen) like “Peace Bomb” by von_brandis.

2. Oversized

Oversized prints are larger and cover most of the front of the t-shirt without bleeding onto the sleeves, collar, or hem; basically the edges like bortwein’sISO 808.” Designs like wotto’sThe Gents” and tesseract’s “Sophronia” are still considered oversized due to the fact that our printers are so good at what they do, they can line up the edge of the design just right to the hem (btw, the hem refers to the bottom of the t-shirt, or any piece of clothing for that matter).

3. All-over

All-over Print Examples

Ah, the all-over design that we all are so fond of. These prints are exactly how they sound “all-over.” A perfect example is alexmdc’sThe Hidden People,” which is also known as a belt print. As you can see, the print touches all edges of the t-shirt. In “When the Sun sets in the City of Sunrise; Another View,” rejagalu has the artwork going off the collar, making it an all-over print. For SheViper’sWonderless” the lion’s head goes off the side of the sleeve, which means, that’s right! All-over print! Here are some extra pointers to know about all-overs.

Things to take into consideration when designing your allover artwork:

SEAMS, SEAMS, SEAMS (AND COLLAR)! Remember that seams and ink don’t get along too well, and if your design goes over the seams, (which an allover print will most likely do) it won’t come out completely perfect, but it will be the best non-cut-and-sew printing anyone can accomplish around these parts. BeadlerWork’sUnification” and Mitohapa’sRed Run” are great examples.

  • Collar Print Example Collar
  • Under Arm Print Example Under Arm
  • Bottom Seam Example Bottom Seam
  • Side Seam Side Seam

SLEEVES! It’s hard to put this into words, so we will just show you what we mean with pictures, It’s a lot simpler and more direct!

Sleeve All Over Example

One last thing to keep in mind about all-overs...

SIZES! Make sure your design is long enough, especially if your artwork has a cityscape. Additionally, understand that there will be inconsistencies between the size runs, since a size XXL is proportionally a lot wider than taller than a size small. For example, Inner-Monster’sThe Optimistic Bot.”

  • Print Sizes ExampleSmall
  • XXL ExampleXXL

Printing Techniques & Appliques

For those who are new to the world of t-shirt graphic design and decoration, we would like to open your eyes to the many design possibilities available here at DBH and help get your creativity flowing. Along with standard plastisol inks, below are a few of the other techniques and processes we are currently offering to our designers. Keep checking back as this list will continue to grow and evolve.

8 Colors, Gradients, & Half-tones COLORS, GRADIENTS, & HALF-TONES
Designs can be submitted using up to 8 colors per design and may contain gradients and half-tones.
High Density Inks HIGH DENSITY INKS
High density ink is used to give a design a dimensional appearance or texture. This type of ink can also be used to give a look similar to stitching and are available in virtually any color.
Flock FLOCK
Flock is a technique that gives the design a fuzzy feel. It has a similar look and feel to felt and can be applied in many colors.
Foil FOIL
Foil is used to give a design a shiny metallic look. Foils are great for adding highlights to a design.
Suede SUEDE
This type of ink, as the name indicates, has the look and feel of suede. When applied to a t-shirt it adds texture and dimension.
Metallic Ink METALLIC INKS
Metallic inks are used to give the design a metallic shimmer. The shine is not as strong as a foil and is great for subtle highlights.
Gel GEL
Clear gel can be applied over a print to give it a glass-like look. Gel is also available as a high density gel for an even thicker appearance and rubbery feel.
Water-based Ink WATER-BASED INKS
Water-based inks are used to give a design a soft-hand feel and almost no-hand feel after wash. The result is a design that looks and feels like it is almost part of the fibers of the shirt as opposed to a plastisol print that sits more on the surface of the fabric. Water-based inks are often used to achieve a vintage look.
Discharge DISCHARGE
Discharge is basically a bleaching agent that is used to take the color out of the shirt. Discharge can be applied as raw discharge or tinted discharge. Raw discharge will give a dark-colored shirt a bleached look, and tinted discharge results in a more muted tone of the ink color that is used.

Login, Human!

Forgot Password?

Create An Account

Membership comes with a lot of benefits. You can get
exclusive deals, vote on your favorite designs you want
to see printed, plus lots more.

Join the HÜMANS Tree by oliver